Monday, December 10, 2018
Monday, December 3, 2018
4-H Scratch Program developed with Google
 These block language exercises are great for teaching nearly anyone the foundations of programming algorithms.
 Click here:
Animate a Name: g.co/csfirst/nysdname
or here
https://csfirst.withgoogle.com/c/cs-first/en/animate-a-name/animate-a-name/animate-a-name.html
Sunday, December 2, 2018
Thinkabit Curriculum Exercises
We'll enjoy having you work through our curricula before we take the next steps for sharing them widely.
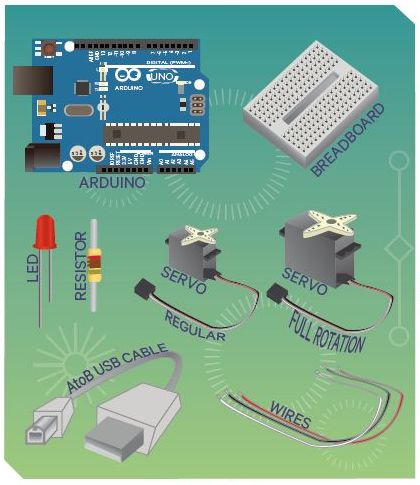
- This is the outline for our Robocrafting Lab traffic light and servo motor exercises most of you have done previously - https://goo.gl/n5wh9m
- Here is a page where we're developing a few dozen diffeent exercises, listed progressively: https://goo.gl/wD21CL
Monday, November 26, 2018
Monday, November 12, 2018
Serial input - Unlock the door for person b
/*Using the small servo in pin 6, power in VIN, and black wire in GND
* wire for red LED in pin 13, wire for green LED in pin 7
*/
// Wei's demo of if-else-if statement, plus a Servo door lock!
#include<Servo.h>
Servo DoorLock;
void setup() {
// put your setup code here, to run once:
Serial.begin(9600);
pinMode(13,OUTPUT); //The led is in PIN 13
DoorLock.attach(6);
Serial.println("WELCOME !");
}
char who=0;
void loop() {
// put your main code here, to run repeatedly:
Serial.println("who are you?");
if(Serial.available()>0){
who=Serial.read();
}
if(who=='a') {
digitalWrite(13,HIGH);
digitalWrite(7,LOW);
delay(500);
Serial.println("person a wants to enter the building");
}
else if(who=='b') {
digitalWrite(7,HIGH);
digitalWrite(13,LOW);
Serial.println("person b is allowed to enter the building");
DoorLock.write(90)
delay(2500);
DoorLock.write(0);
}
}
Serial input and monitoring - Who's at the door?
// Wei's demo of if-else-if statement.
void setup() {
// put your setup code here, to run once:
Serial.begin(9600);
pinMode(13,OUTPUT); //The led is in PIN 13
Serial.println("who are you?");
}
char who=0;
void loop() {
// put your main code here, to run repeatedly:
if(Serial.available()>0){
who=Serial.read();
}
if(who=='a') {
digitalWrite(13,HIGH);
delay(500);
digitalWrite(13,LOW);
delay(500);
Serial.println("person a wants to enter the building");
}
else if(who=='b') {
digitalWrite(13,HIGH);
delay(250);
digitalWrite(13,LOW);
delay(250);
Serial.println("person b wants to enter the building");
}
}
Thursday, November 8, 2018
Serial monitoring for Arduino sketches
Open Arduino, then use FILE, NEW.
Select and replace that template with the following. Colors will appear automatically.
=====================================
#include<Servo.h>
Servo HokieServo; // My first servo is named HokieServo
void setup() {
// put your setup code here, to run once:
HokieServo.attach(6);
Serial.begin(9600);
}
void loop() {
// put your main code here, to run repeatedly:
HokieServo.write(45);
Serial.println("\t Speed is 45 - left, medium speed");
delay(1000);
HokieServo.write(135);
Serial.println("\t Speed is 135 - right, medium speed");
delay(1000);
}
Subscribe to:
Posts (Atom)